Tuesday, 24 February 2015

My accident & introducing "Madge"

Hi there, sorry I haven't posted in a few days. If you follow me on Instagram you would have seen that I badly burnt both of my hands on the hot glue gun. It was pretty nasty and left me out of action for a number of days, but my wounds are healing nicely and I now have full use of both hands again.

My left hand.

My right hand. 

Just as I started to catch up on lost sewing time my 43-year old Elna Supermatic sewing machine died. Mum very generously lent me hers for a few days but it didn't like me very much.

This morning my brand-new-to-me Janome arrived by courier - SQUEEEEEEEEEEEEEEEEEE!!!!!! It is a gift from a VERY special friend who has recently upgraded her own machine so this one was now surplus to her and was needing a loving home. I can't tell you who she is but I think some of my closest friends will guess who my fairy godmother is - actually she's more of an angel than a fairy and I cannot thank her enough for her loving generosity! 

I've decided to name the Janome "Madge". 😃

This is Madge - a Janome Memory Craft 6500. 

I haven't had a chance to play with Madge yet as I need to earn my Janome degree & I admit I am feeling rather nervous as she's so modern & computerised! But I am also very excited & am looking forward to learning how to use her.  She has a automatic thread cutter!!! SQUEEEEEE!!!!!!!!! And a needle down button! (Hey, my Elna is 43-years old, these luxuries were not invented back then!).

I have so many blog posts to catch up on but first I need to catch up on my sewing as I have a number of deadlines approaching fast. 

I also wanted to say thank you to everyone for your well wishes following my accident! I received so many sweet messages via Instagram that I couldn't keep up with them all. I feel so very blessed to have so many wonderful friends - I'm tearing up as I type this - ok, I'll end here as I'm getting quite emotional. It's been a HUGE day for me but I wanted to say THANK YOU & a very special HUMUNGOUS THANK YOU to my beautiful Fairy Godmother - you know who you are & I am forever indebted to you ❤️

Tuesday, 17 February 2015

Double Goosed Kaffe Style

 
It all started with this lovely piece of Kaffe Fassett fabric called "Purple Big Leaf" from his 2014 Fall collection.  I wanted to send a special gift to a dear friend of mine overseas but had been undecided what to make for her.  When I posted a photo of this purchase on Instagram, she commented how much she loved this print.  I knew then and there that I would use this print for her gift.  I know that my friend especially loved the teal and the purple in this print so I wanted to make a feature out of both of these colours.   I spoke to the squirrels and we selected a pattern - "Double Goosed" by Jeliquilts.
 
My friend had no idea what the squirrels & I were planning, but she did get taunted with the following photos which I tagged her in on Instagram...
 
Snowy the Squirrel cranked up the Bollywood music and danced in his Sari whilst we sewed


I couldn't work out why I had such a hard time removing the papers after I had pieced it - later I realised that I had forgotten to change my needle.  Instead of a 90/14 I was still using a 70/10.

Binding - purple & teal.
The parcel decided to take the slow boat to America, but after 4-weeks of anxious waiting (and stalking of my friend's Instagram feed) it finally arrived YAY!!!! Now that I know that she has her parcel, I can share the rest of these photos with you...
 
Completed top with border number 1 attached.

The completed mini.  I decided to use teal binding to enhance the centre circle of teal geese.


https://payhip.com/Jeliquilts
Click on the logo above to access Jeliquilts' pattern shop.

Thursday, 12 February 2015

My Schnitzel & Boo "Parcel of Awesomeness" has arrived!

 
Last week I posted about the Schnitzel and Boo Mini Quilt Swap and showed you the parcel of awesomeness that I sent to my swap buddy - Fiona Tchan.  Today it gives me great pleasure sharing with you the amazing parcel of awesomeness that I recently received from the super wonderful Filomena Parbery @so_filomena from New South Wales.
 
Firstly these are the inspiration mosaics that I posted for this swap featuring a mixture of different techniques with a preference for lime green & teal:


I knew from the moment that the parcel delivery guy handed me the parcel that something special had arrived - just look at how the parcel was addressed!

 
But before I show you what was IN the parcel, these are the teasers that she had posted on Instagram.  I had seen most of these posts and I must admit, I did wonder if those gorgeous hedgehogs were headed to Bendigo... (Instagram photos reproduced with Filomena's permission)


 So, back to the parcel... this was written on the envelope:

I was getting good vibes about this parcel!
 
I'm not going to share what was written inside the card but it brought tears to my eyes!  Such beautiful words!!!
 
And here is the beautiful Hazel the Hedgehog quilt that Filomena made.  I love the pinky red nose on the top one!!  The quilting on this is just extraordinary!
 

I was thoroughly spoilt!  My favourites - Cadbury Peppermint chocolate & Nutella.  Also some peppermint tea and coffee.
 

One of my favourite Australian fabric & stitcherie designers is Rosalie Quinlan, and Filomena generously included 3 fat quarters of Rosalie's fabrics together with some buttons and two skeins of Cosmo Pearl 5
 

These are absolutely adorable.  Filomena has crochetted these coasters herself and they will go beautifully in my kitchen.


A packet of green Ruffle Elastic
 

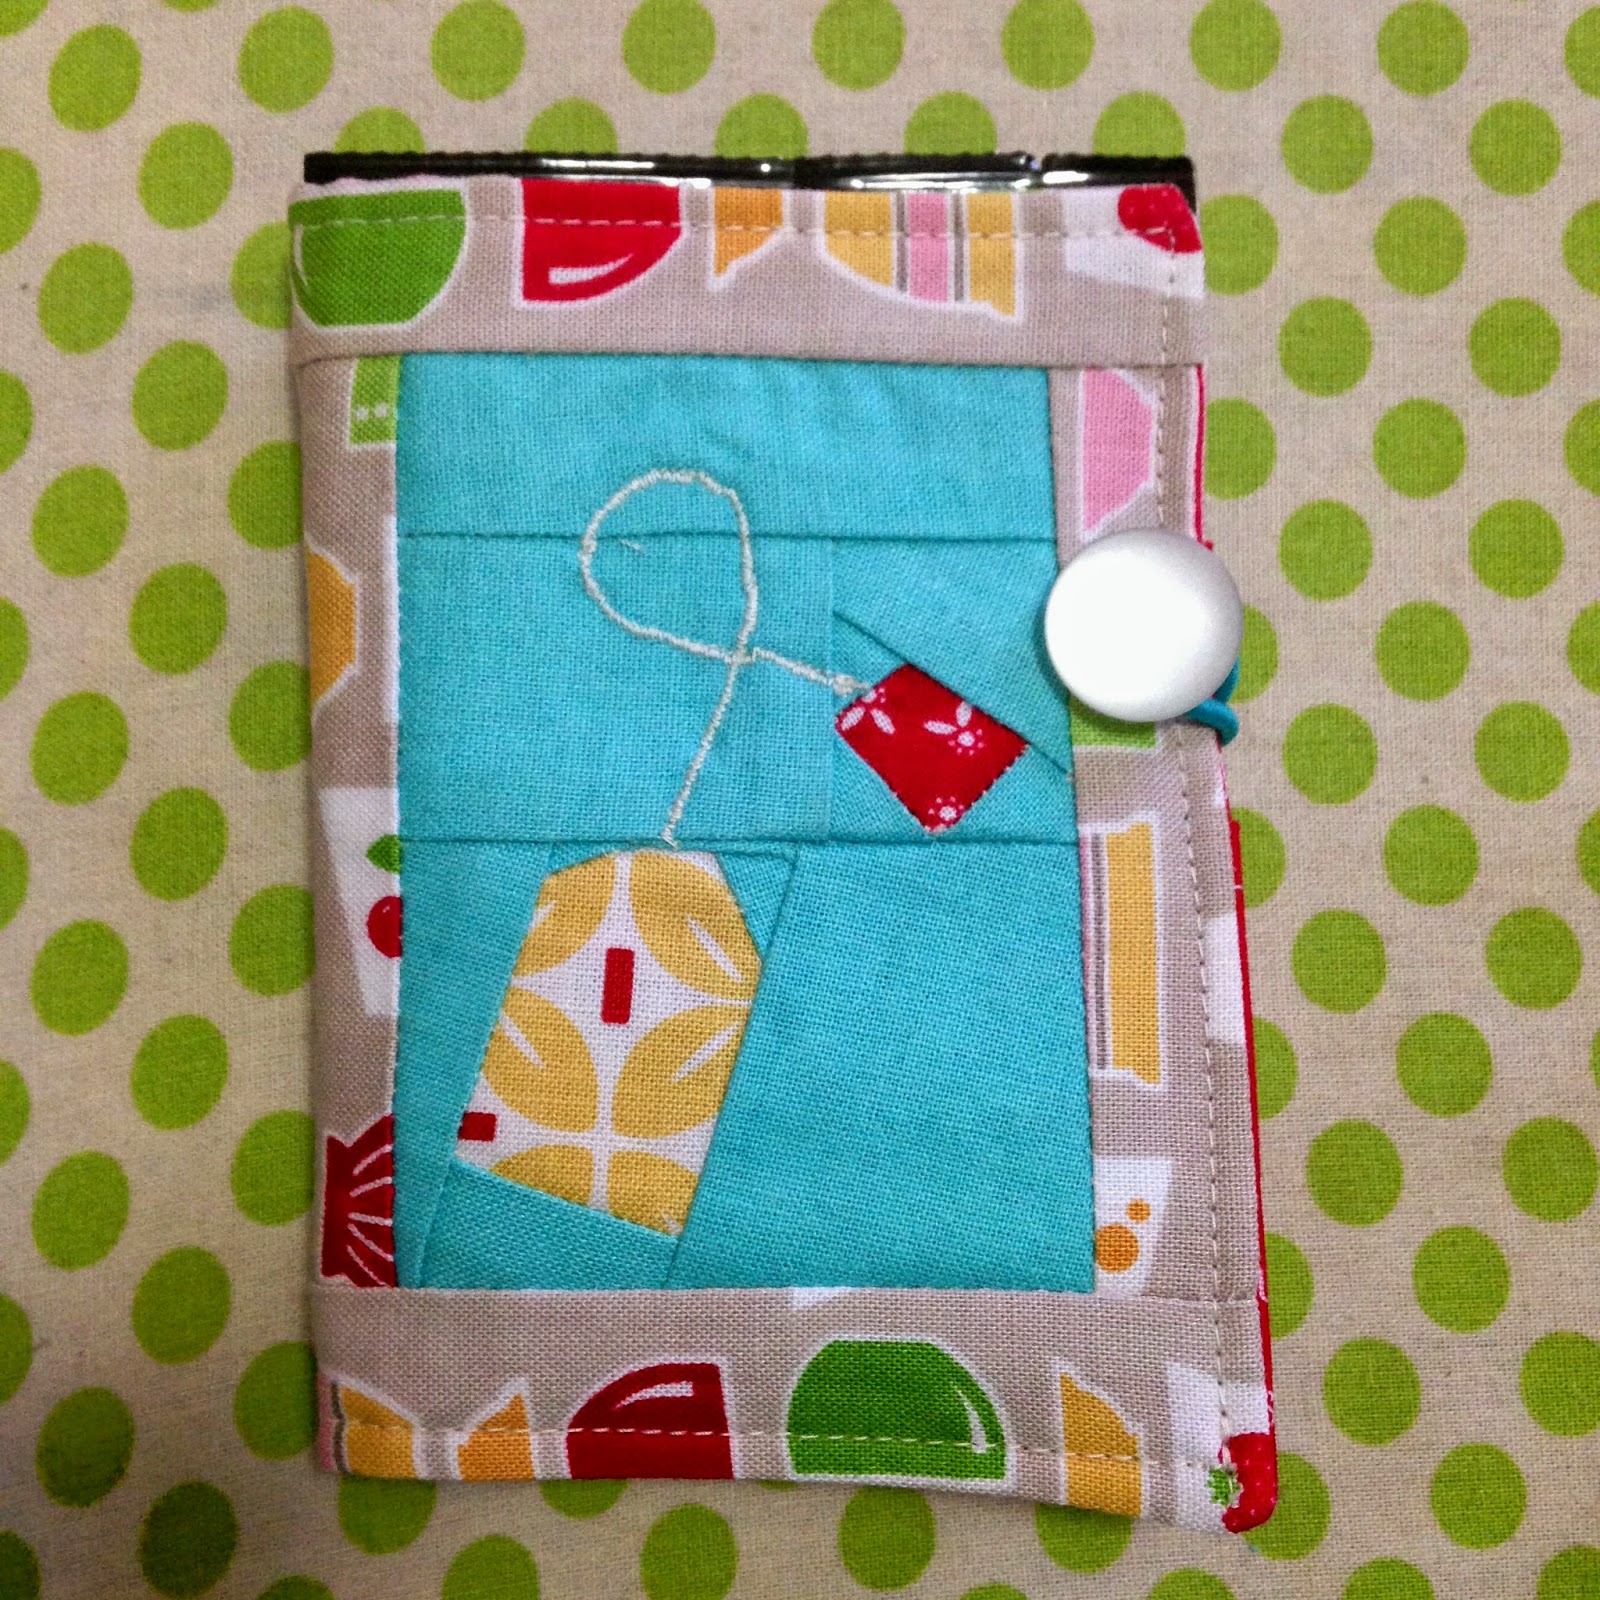
This is absolutely gorgeous - it is a Tea Bag Holder with a tea bag design foundation paper pieced on the front.  The fabrics are just gorgeous, especially the red text used on the inside.
 

The tea bag holder opened up and showing the contents - herbal tea bags & coffee bags.
 

A close up of the inside.  I love this red fabric! 
 
This really brought a tear to my eye - not only did Filomena spoil me rotten, but she also thought of my little purr baby Gemma and included a treat for her as well!
 

Gemma says thank you Filomena for the Love Hearts! xoxo
 
I really am just totally overwhelmed by the awesomeness in this parcel!  Obviously Filomena has had a lot of fun stalking me and researching my preferences. 
 
One of the hashtags for this swap was #makeaquiltmakeafriend and that is so true.  Through this swap I have got to know two new quilty friends - Fiona and Filomena.  I have also enjoyed watching Fiona create some wonderfulness for her swap partner; and watching Filomena's swap buddy make the gorgeous mini that she sent to Filomena.  Feel the quilty love!  There are so many talented quilters out there!  To view more wonderful creations look up #schnitzelandboominiquiltswap on Instagram.

Monday, 9 February 2015

Hazel Hedgehog QAL

Hazel Hedgehog QAL on GnomeAngel.com
 
Welcome to the Hazel Hedgehog Quilt-a-Long Blog Hop...
 
The gorgeous Angie at Gnome Angel kicked off the Hazel Hedgehog Quilt-a-Long last week and asked if I would be her guest blogger for today.  How could I say no?  We all love Angie and we all love Hazel the Hedgehog!  Before we get going I wanted to extend a very special hello to all new visitors who are blog hopping today.  If you would like to follow my blog there is an email subscription option and a Bloglovin button on the right hand side.  I promise not to spam you!
 
Today I would like to show you a few tips on how to make the regular sized Hazel Hedgehog quilt block and the Hazel Hedgehog Glasses.  You will need to purchase a copy of the pattern from Elizabeth Hartman (see below for how to save 25% off the cost of your pattern/s).
 
Selecting Fabrics
 
Choosing fabric can sometimes be one of the hardest parts about making a quilt or quilt block.  Lately I have been experimenting with bright fabrics and I recently purchased some Kaffe Fassett prints.  I'm not a huge fan of all of his designs but some of them are just amazing, especially this particular colour combination.  One of my current favourites is called "Curly Baskets".  This fabric features beautiful large blue and purple swirls called Curly Baskets.  It also has touches of teal and mint swirled through it.   I decided to let this fabric be the hero of my Hazels and would use it for the hedgehog spines.  As I only had a fat quarter of this fabric I decided to make 3 hedgehogs (based on the first Hazel Hedgehog pattern release.  These quilt blocks will measure 8" x 9" or can be turned into 12" blocks by adding sashing - refer to page 5 of the pattern).
 
Curly Baskets by Phillip Jacobs for Kaffe Fassett for Westminster fabrics. 

I sorted through my collection of solids and found three coordinating sets of colours to match my print - Mint, Purple & Blue.  Don't forget that you will need a light fabric for the faces and a medium fabric for the bodies, so I grabbed two shades of each.  I also grabbed some black for the eyes & nose and for the background I chose to use some black Essex Linen.
 
My fabric pull.

Some Tips to Piecing Which Will Give You Better Accuracy
 
Making the Block: After you have cut all of your pieces, I strongly advise you to label all of your pieces.  When you move them from your cutting area to your machine, do remeasure to ensure that you label the correct pieces as many look similar to the naked eye.  This will save you from growing a few grey hairs and a lot of unpicking (yes I speak from experience)!

Make the Spines Unit - Step 5.  Does your Hazel have a wonky ear?  Use a pencil or a water erasable pen to mark a diagonal on the reverse side of piece E so that you have a straight line to sew on.   Can you see how wonky my sewing line was before I accurately marked it from corner to corner with a ruler.  It was only a few millimetres out but just a few millimetres here and there can make a huge difference to your finished hedgehog.

Now my Hazel has a lovely straight ear.
Finish the Block Step 1 - When sewing the Spines Unit to the top of the Head Unit.  Use pins to line up your seams.  Where the red arrows are I have poked pins from the top layer to the bottom layer where the seam allowance is to ensure that they line up.  You want the bottom of the ears to match up with the inner top corners of the C's (yep the rectangles above the eyes).  I have then secured the fabric by pinning it (see the three other pins).  The top pins marked with arrows were removed prior to sewing.
Here is another view of that same photo.  As you can see the top pins are just poked through the two layers to check for alignment.  Before I remove them for sewing I have secured the fabric by pinning it in place using flat quilters pins.
 
Finish the Block Step 2.  Sew the Side Units to the left and right sides to finish the block.  I have used a pin to align the top and bottom layers of fabric.  You need to make sure that the join of the top of the body (G) lines up with the lower left (or right) corner of the ear.  Once you have correctly aligned your fabric, pin it in place with flat quilters pins and remove the pin (marked with the red arrow). 

Making the Glasses

I've decided to add glasses to my minty green Hazel


I have used a product called "Therm O Web Heat N Bond Ultrahold"  It is an ultra strong paper backed iron-on adhesive designed specifically for all no-sew apparel, craft & home decorating projects.  Unlike other fusible web products, HeatnBond's solid layer of glue provides three times more bonding strength and requires less heat and shorter pressing time.  With HeatnBond Ultrahold, materials won't lift or pucker.  Edges don't need to be sealed. Materials can be machine washed. 
 
I just followed the manufacturer's instructions and the easy to follow instructions on Elizabeth Hartman's FREE download for the Hazel Hedgehog Glasses.  This was so much easier than I imagined!


And now my Hazel looks like a Librarian! ;0)


My completed top

How Did I finish off my Hazels?

I used a polyester batting and stitched around the ditch of my hazels to make them nice & puffy.  I ended up ordering some extra Kaffe Fassett fabric so that I could bind my quilt in the same fabric.  My finished quilt measured 12.5" x 31" which is an ideal size for a table runner or a long mini quilt.
Table Runner

Hazel and the Hedgehogs


Hazel and the Hedgehogs


Thank you for joining me today.  I hope that you will find these tips useful and that it will encourage more of you to try Hazel's glasses. 

 
Would you like to save 25% off the purchase of the Hazel Hedgehog patterns from Elizabeth Hartman? 
 
Would you like to save 20% off your next fabric purchase from Cotton Factory (Australia) or Gotham Quilts (USA)? 
 
Would you like to make your own Hazel the Hedgehog and win a prize? 
 
If so, please visit Angie's blog post at Gnome Angel (links below):


KEY DATES WITH BLOGGERS
Ø WED 04 FEB – Hazel Quilt-a-Long Begins @ GnomeAngel.com
Ø FRI 06 FEB – Interview with Elizabeth Hartman @ GnomeAngel.com
Ø MON 09 FEB – Fiona @ Bendigo Lioness
Ø WED 11 FEB – Anita @ Daydreams of Quilts
Ø FRI 13 FEB – Raylee @ Sunflower Quilting
Ø MON 16 FEB – Brandy @ M3 Quilts
Ø WED 18 FEB – Melissa @ Ms Midge
Ø FRI 20 FEB – Tara @ Simply Crafted
Ø MON 23 FEB – Cassie @ Cassandra Madge
Ø WED 25 FEB – Kate @ Stitched with Love
Ø FRI 27 FEB – Link UpGnomeAngel.com & Gotham Quilts
During the Hazel Hedgehog Quilt-a-Long, the hashtag that we are using for all social media is: #HazelQAL  Other hashtags are #hazelhedgehogquilt and #hazelhedgehog - however only "compulsory" hashtag is #HazelQAL