 |
| Kerry's String Circles block |
The following tutorial has been written to assist my fellow Quilty Sisters in making their String Circles bee blocks. This is an alternate option & is easier than what is in the book & you won't need to buy any fancy equipment. All you need is 3 photocopies of the template page and a 90/14 sewing machine needle.
I have purposely NOT included measurements or the templates for this block as it is subject to copyright. If you would like the pattern for this block, please purchase the book: "Modern Bee - 13 Quilts To Make With Friends" by Lindsay Conner. It is an excellent book and the profits will go to those who are due them.


Yes it looks scary, but I urge to you to give it a try and I think you will amaze yourself! Prior to making this block I had never sewn a circle before. I do paper piece but not the method shown in this book. I am self taught with one of Carol Doak's books & tutorials. It seems to make more sense in my brain than other methods I have seen. If you are more comfortable using a different method of paper piecing by all means go for it. There are no quilt police!
These photos were originally posted on Instagram with the hash tag #KerrysCirclesOfDoom - I have reposted them here to make life easier.
 Setting Up: I have photocopied the template from the book and sticky taped it together using magic tape to form a circle. Use a size 90/14 needle in your sewing machine & set your stitch length to 1.5 - this will make it easy to remove the paper at the end without ripping apart your stitches. Normally I would use an open toe foot for paper piecing however this is so simple that your regular 1/4" foot should work fine. By the way I have the photocopy paper around the wrong way in this photo - you want to join the strips to THE BACK of the paper and not the front. See next photo...
 Block Assembly: Forget the glue stick the book talks about. Instead lightly finger press the white strip down the centre & align the fold mark with the centre of the white circle. Pin it in place. Place coloured strip FACE DOWN & join as per instructions in book. IMPORTANT: The printed side of the paper is face down with the fabric strips being sewn on to the back of the paper. Also make sure that your strips of fabric are long enough & wide enough to cover over the outer circle on the template once they are sewn together, otherwise you will need to redo this with wider/longer strips.
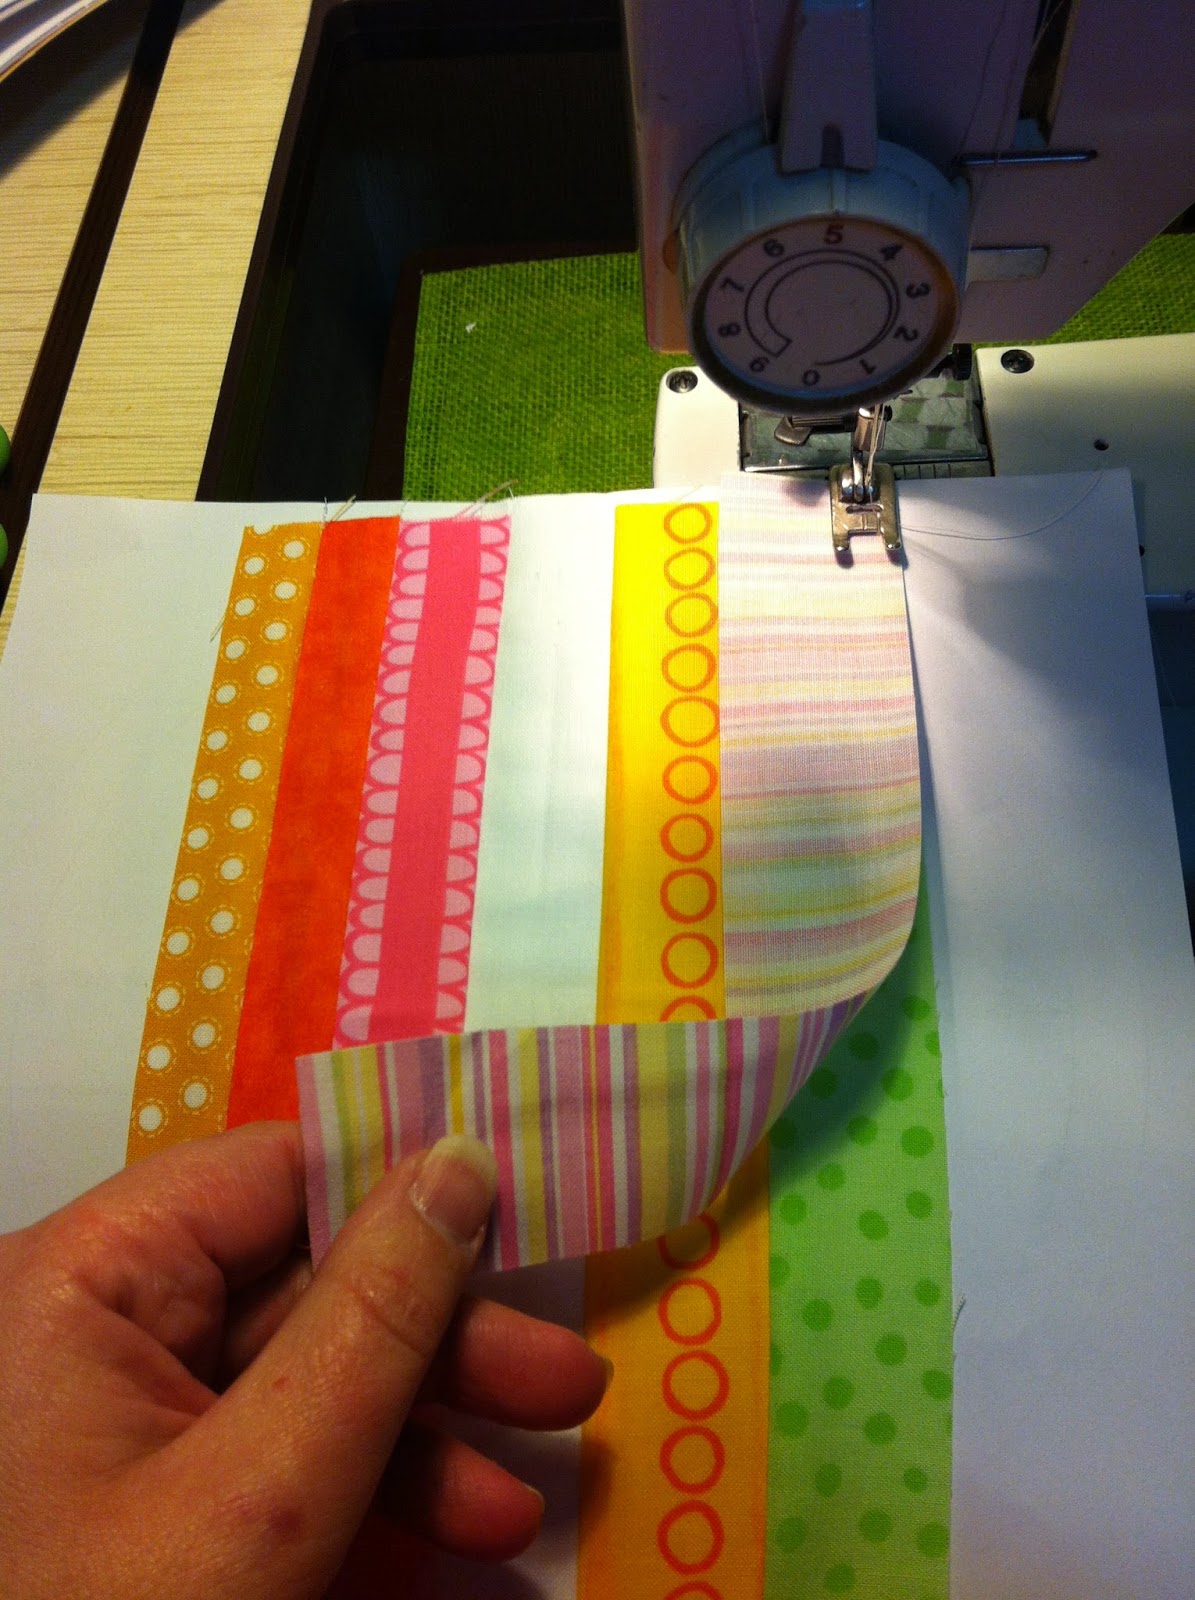 This is the easy bit - lay fabrics face down upon the previous piece, aligning the right hand sides. Sew them together on top of the paper using 1/4" seam. Fold over each piece after it is sewn and press the seam straight & flat before joining the next piece. {Worse case scenario, if you cannot manage this, just sew your strips together & use the circle as a pattern to cut them out. Personally I found the paper helped to stabilise the circle as I sewed it but I have since sewn another circle without the paper & found it ok}. It doesn't really matter which method you use as long as your seams are straight & the end result looks fab!
  Cut out the pieced bit along the outer circle of the template.
 I don't have one of those fancy cutting circle thingies that is shown in the book & I wasn't going to rush out to buy one so I just folded the white backing fabric into quarters; folded the template in half & pinned it to the fabric making sure that my folds & edges were properly aligned.
Cut out white circle from the background fabric along the smaller circle line. This photo depicts the three pieces that you should now have. You will not be using the inner white circle.

Joining the two sections: Now you are ready to pin the white background to the coloured circle. You will need LOTS of pins. The easiest way to explain how to pin is by imagining the coloured circle is a clock face. Place pins opposite each other as follows: pin 12 o'clock then 6 o'clock; pin 3 o'clock then 9 o'clock; pin 1 o'clock then 7 o'clock; pin 4 o'clock then 10 o'clock; pin 2 o'clock then 8 o'clock; pin 5 o'clock then 11 o'clock; and then fill in any gaps with more pins.

Very very carefully sew 1/4" around the 2 layers of fabric, removing the pins as you go & smoothing out the fabric. Make sure the two layers of fabric are even as you sew. As the paper is still attached to the bright circle, you are still using a 90/14 needle & a 1.5 stitch length. Anything different could make removing the paper difficult and you could rip out your stitches when you remove the paper

Here's a tip - I often use my unpicker to hold the fabric flat in front of the needle as I sew. It's better than sewing over your finger & you can get in nice & close. Using one hand to hold the fabric at the back will give you more control. And sew SLOWLY!! Snail pace. It is not a race and will help you smooth out the fabric as you sew. You may have doubts & think that you will have excess fabric left over but you won't. It is just an optical illusion. As long as you have cut the two pieces on the correct template and pin well & smooth out your fabric it will match up beautifully!!! Oh & don't forget to breathe! ;0)

This is how it SHOULD look after you have sewed the inner circle to the background fabric. Now you can remove the paper. Gently tug it and rip it off. As long as you used a small stitch length of 1.5 & a size 90/14 needle the paper should be easy to remove by hand. If any paper is caught in the stitches just use tweezers to remove it. You might wonder why I keep harping on about this stitch length & needle size. The wider needle will punch a larger hole through the paper making it easier to tear. The smaller stitches will create a stronger stitch that won't rip away when the paper is removed and it will also help to perforate the paper making it easier to remove.
 This is how the top layer should look before it is ironed. Iron from the back and gently flatten out the join before flipping it over and ironing the front. And there we have one completed "citrus" circle of doom. Mine has a few wrinkles around the join but Julie says that using starch will hide this. The brand she recommends is "Best Press" but it is not the cheapest on the market and is usually sold in quilt shops. But she says that any starch will do.
Kerry
also sent a link to a tutorial that she found on Pinterest and hoped that
it would offer extra help for the circles:
I think I'll try this! I love doing reverse applique and think it would be fun to use for these circles! Oh and can you imagine doing hearts? Fun!
ReplyDelete