Back in July a friend alerted me that there was a swap starting up on Instagram called the #VeryCherrySwap Naturally I was in. I sent off my enquiry, filled in the questionnaire, and waited anxiously to see if I would be accepted. After a few nervous days of waiting I received my acceptance notice and not long afterwards I was introduced to my Cherry Swap Partner - the lovely Kath.

 As it turned out Kath and I were already following each other on Instagram but we really didn't know all that much about each other. Thus began a good friendship as we started stalking & researching each other and planned and plotted our cherry projects with assistance from the Secret Squirrel. Many sneaky peek photos were shared on Instagram as we taunted & teased each other along the way revealing hardly anything but the odd snippet of fabric or of squirrels eating cherries. Many laughs were shared, many stitches have been sewn, and the secret squirrel has been well fattened by eating way too many cherries.
I knew that Kath loves blue. I knew NOT to use any purple or batiks. I knew that among her favourite designers is Bonnie & Camille (the others I either didn't have any of their fabrics or I didn't know of them). And I knew that the types of items that she would be happy to receive are: "mini quilt, mug rug, cushion cover, sewing pouch or bag, pincushion, needle book".
Over the next 2-months I browsed gift shops, supermarkets and of course eBay, searching for cherry related items to go in her parcel. Now that our shipping deadline has passed and I know that Kath has safely received her parcel, I can finally show you items that I made for her. I will do a separate post showing what I received from Kath.
Mini Quilt
 I experimented with a few designs for a mini quilt. I was quite fond of a free pattern by Podunk Pretties that I found online which used many HSTs to form the cherries; however the blocks measured 12.5" each and I wanted to use 5 cherry blocks. When I reduced the size of the blocks they looked too warped. I then tried to paper piece cherries but they looked too wrong for perfectionist me. Eventually I decided to hand stitch the cherry panels with embroidery thread. I used some "April Showers" and "Miss Kate" fabric by Bonnie & Camille for the spacer blocks. Although I felt much happier with this approach the mini didn't quite have enough oomph (it's important that my quilts have the oomph factor!) so I decided to applique the centre cherry block. From memory the mini quilt measured about 18" square.
 |
| Sewing on the quilt label |
Sewing Pouch or Bag
I'm still pretty inexperienced to sewing with zips, but I was determined to make something "zippy" for Kath which fitted this brief. I contemplated making a "Sew Together Bag" for her but thought it might be a bit advanced for me with all of those zips, so instead I made a small & a large Open Wide Zippered Pouch (pattern by Noodlehead).
The smaller bag is made & lined with "Avant Garden by MoMo by Moda" and the larger bag is lined with "Rose & Hubble English Collection by David Textiles Inc.".
Mug Rug

I still had an embroidered cherry panel left over from the mini quilt so I decided to turn it into a mug rug.
Lately I have been sewing hexis at night (for another project), so I set about designing something combining these elements.
 |
| Close up of the quilting. |
I was determined to use more blue so I pulled out my "Miss Kate" by Bonnie & Camille and found some yummy coordinates amongst my scrap container. Both the red solid and the blue solid (used for the binding) are from "Miss Kate".
The good thing about making 1" hexis is that you only need scraps measuring 2.5" square. Yes I keep almost all of my scraps, you never know what you can do with them!
I finished it off by hand quilting in blue thread (I used white thread on the cherry panel), sewing about 1/4" inside and outside of all of the seams. I used more of the "Rose and Hubble" cherry fabric on the back.
Extra Cherry Goodness
Here are photos of some of the extra cherry goodies which I included in Kath's parcel:
 |
| Air Freshener, Lip Gloss & Crafty Cherries |
 |
| a limited edition Dark Chocolate Ganache Cherry Ripe, a Cherry Bounty, a Cherry Ripe & a tin of Cambridge & Thames Cherry Drops |
 |
| Not cherry related but some variegated blue sock wool from the Bendigo Woollen Mills as Kath likes to knit |
The Cherry Fabrics
Here is a close up of the two cherry fabrics that I used.
On the left is "Rose & Hubble English Collection by David Textiles Inc." & on the right is "Avant Garden by MoMo by Moda"
The Results: Kath received her parcel today. Here is her feedback:


 I experimented with a few designs for a mini quilt. I was quite fond of a free pattern by Podunk Pretties that I found online which used many HSTs to form the cherries; however the blocks measured 12.5" each and I wanted to use 5 cherry blocks. When I reduced the size of the blocks they looked too warped. I then tried to paper piece cherries but they looked too wrong for perfectionist me. Eventually I decided to hand stitch the cherry panels with embroidery thread. I used some "April Showers" and "Miss Kate" fabric by Bonnie & Camille for the spacer blocks. Although I felt much happier with this approach the mini didn't quite have enough oomph (it's important that my quilts have the oomph factor!) so I decided to applique the centre cherry block. From memory the mini quilt measured about 18" square.


 Setting Up: I have photocopied the template from the book and sticky taped it together using magic tape to form a circle. Use a size 90/14 needle in your sewing machine & set your stitch length to 1.5 - this will make it easy to remove the paper at the end without ripping apart your stitches. Normally I would use an open toe foot for paper piecing however this is so simple that your regular 1/4" foot should work fine. By the way I have the photocopy paper around the wrong way in this photo - you want to join the strips to THE BACK of the paper and not the front. See next photo...
 Block Assembly: Forget the glue stick the book talks about. Instead lightly finger press the white strip down the centre & align the fold mark with the centre of the white circle. Pin it in place. Place coloured strip FACE DOWN & join as per instructions in book. IMPORTANT: The printed side of the paper is face down with the fabric strips being sewn on to the back of the paper. Also make sure that your strips of fabric are long enough & wide enough to cover over the outer circle on the template once they are sewn together, otherwise you will need to redo this with wider/longer strips.
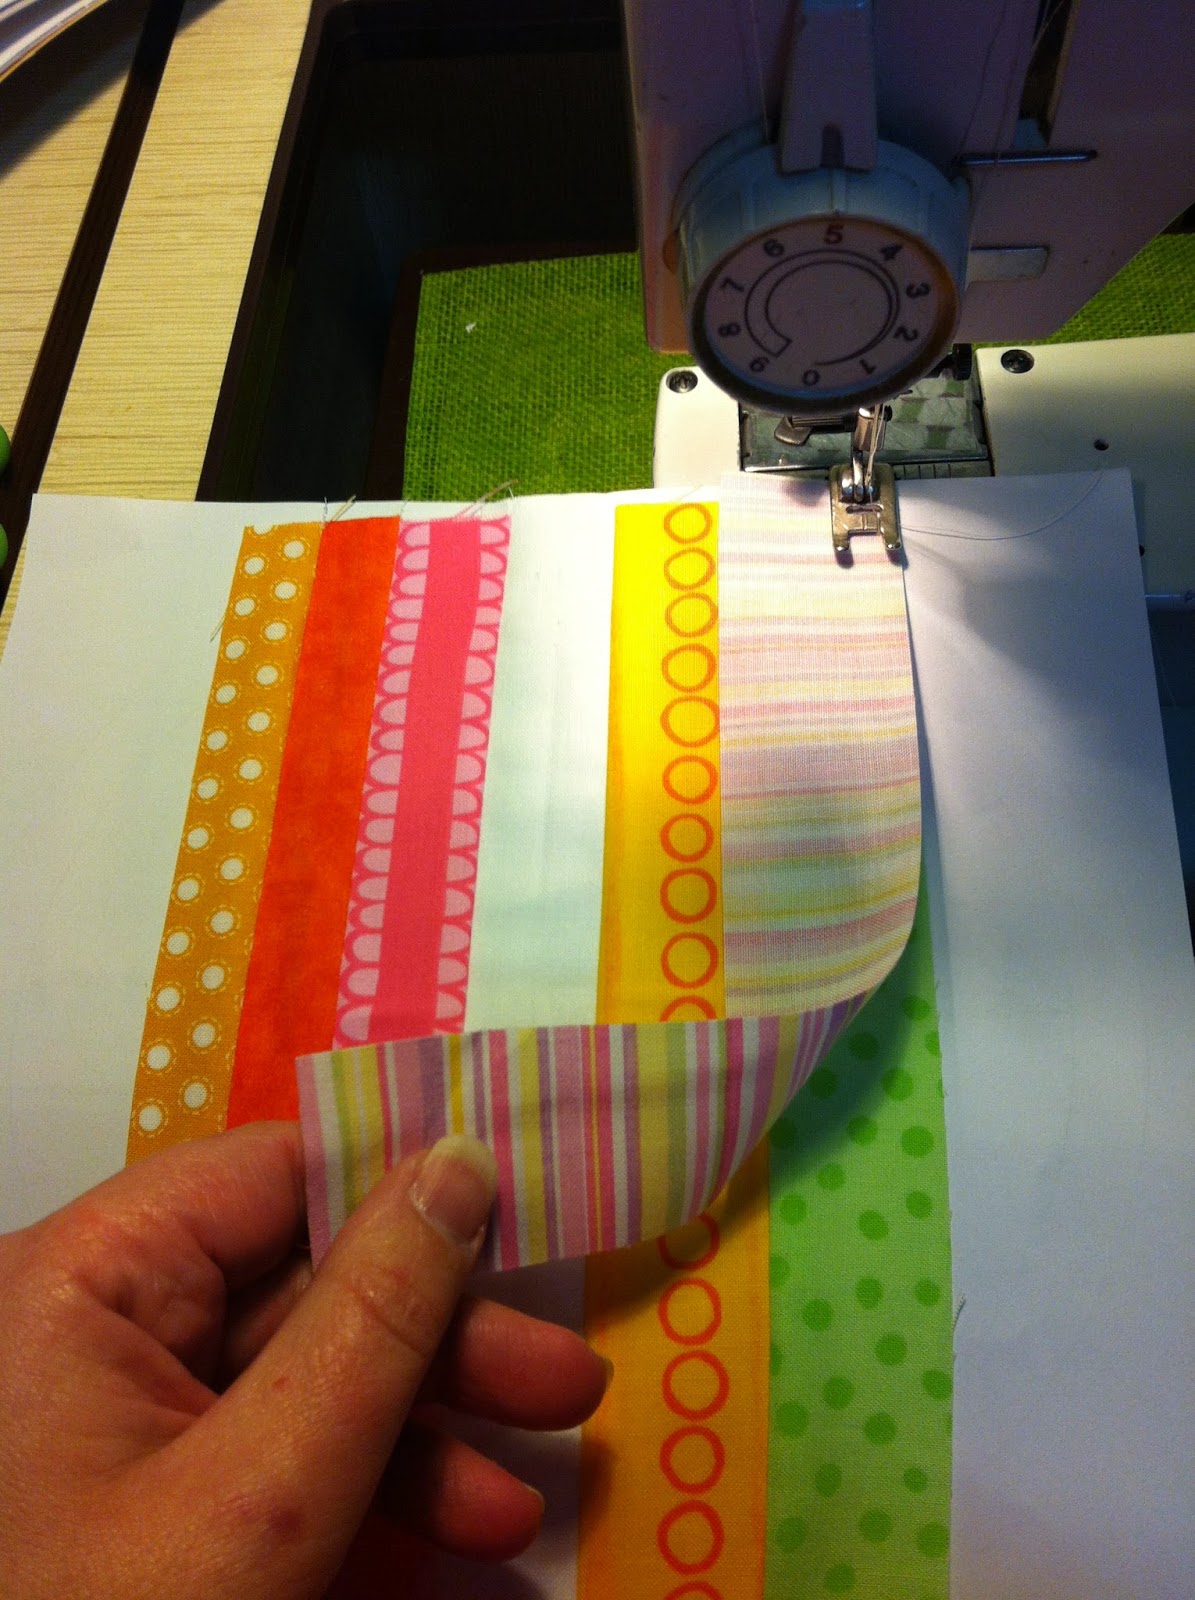 This is the easy bit - lay fabrics face down upon the previous piece, aligning the right hand sides. Sew them together on top of the paper using 1/4" seam. Fold over each piece after it is sewn and press the seam straight & flat before joining the next piece. {Worse case scenario, if you cannot manage this, just sew your strips together & use the circle as a pattern to cut them out. Personally I found the paper helped to stabilise the circle as I sewed it but I have since sewn another circle without the paper & found it ok}. It doesn't really matter which method you use as long as your seams are straight & the end result looks fab!
  Cut out the pieced bit along the outer circle of the template.
 I don't have one of those fancy cutting circle thingies that is shown in the book & I wasn't going to rush out to buy one so I just folded the white backing fabric into quarters; folded the template in half & pinned it to the fabric making sure that my folds & edges were properly aligned.


 This is how the top layer should look before it is ironed. Iron from the back and gently flatten out the join before flipping it over and ironing the front.

 Cut out your templates. Template A is only shown as half so fold your fabric in half and make sure the fold is down at the correct end of the fabric. Pin the template to fabric. (TIP) where the template says "Half of pattern" I folded this edge of the template and tucked the fold under the folded over fabric to stop it from moving and then pinned it in place.
  Carefully cut ON the cutting line (which is the darker line of the template. The dashed line represents the 1/4" sewing line). I used a ruler & rotary cutter on the straight sides & just the rotary cutter on the curves but if you are more confident to use scissors go for it. If in doubt then trim a millimetre outside the cutting line.

 You will need 2 pieces so again I folded over the fabric and cut both pieces at once. I pinned the template to the fabric & used my ruler and rotary cutter to cut the straight edges and carefully cut the curves on the solid line using either rotary cutter or scissors.


 When making something like this I prefer to press as I go. That way I can identify any issues and tackle them head on. For curves I prefer to gently press along the sewing line and then do as Darth Vader suggests and "Press towards the Dark Side!"
 This is how it should look. It should sit completely flat. If it doesn't, check that you have followed all instructions properly so far.
 We now want to sew a (C) to our (AB). Finger press a centre line in your (C) and your (AB) piece. Match up the folded centre lines and pin together. Continue to pin the two pieces together just like you did before.
 Sew the (C) and the (AB) together just like you previously sewed the (A) and the (B) together. Clip/snip along your curve and press towards the dark side with a hot dry iron (using a water spray if needed).


 Check for flatness as you go. If you find that your block starts to stick up a bit, iron it from the centre of the block pressing slowly out to each side and manoeuvre the fabric gently with your hands as you go. Remember the fabric will have some stretch to it so be gentle and if it refuses to yield, spray that rebel with water and press it flat. Show it who's the boss! YOU ARE!


